Indoor positioning system for show robots
Let’s briefly review a very typical case with autonomous robots. This time – show robots:
- Mistakes made by the customer
- Our advice and fixes
The hints we give based on this case can be useful in your own cases as well.
If you struggle with your project or don’t have time, you can always contact us, and we will deploy your system completely remotely: Full Remote Network Planning and Implementation – like we did in this and many other cases.
Task
About 10 wheeled robots come to the scene to dance. They do a choreography for a few minutes. And then they leave the scene. Very simple.
Robots
The robots are designed to entertain – smiley faces, waving arms, speaking capabilities, etc. – but they don’t have sufficient autonomy (aka self-positioning) in the environment of the scene because they are not designed for that. On the other hand, our system is designed exactly for this task – to provide precise indoor positioning and navigation for robots.
Setup
When we were called, the customers had about a week left before the show, and they were stuck.
The case was relatively simple:
- Just a large open scene of 12 meters in diameter or so
- Stationary Super-Beacons are placed 10 meters above the scene
- Only about 10 robots
- Robots are moving slowly (i.e. not drones)
Initial customer configuration
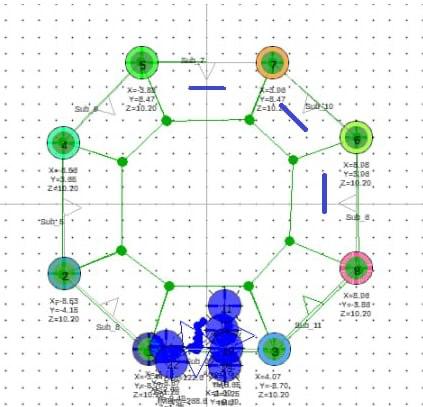
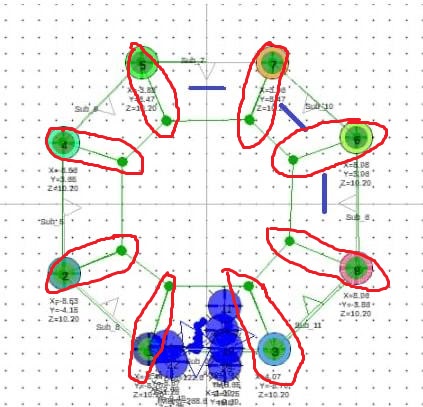
The customer has professional engineers, and by the time we were called, a pretty complex map was already built:
Mistakes and fixes
There were several mistakes done with the configuration. Let’s review them one by one.
1) Too many submaps
To cover a 12-meter scene in 2D (XY), only two stationary beacons would be enough. Several submaps – partially or fully overlapping – is a good solution, but only for special cases:
- Uncontrollable chance of obstruction: tall people around the robot, other robots, other mobile objects
- The map is larger than 30 meters
- There is a very strong need for a high update rate, i.e., the submaps must be small in size
- Very strong external noise and maximum distances must be smaller to have a sufficient signal/noise ratio
None of these were pressing issues in this case.
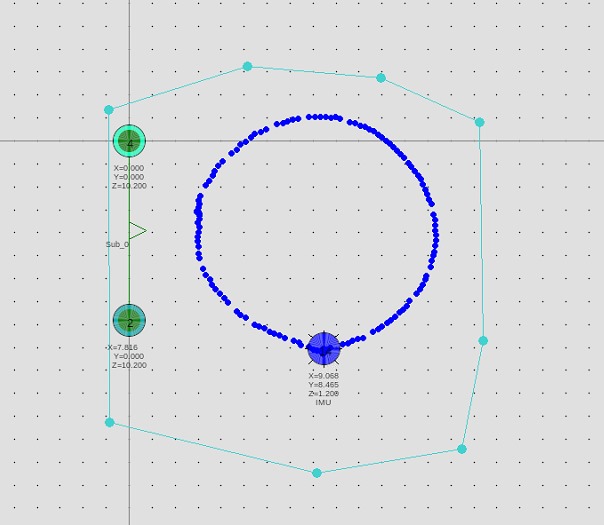
Thus, the first thing we did was to save their initial map and build a very basic 2D map of just 2 stationary Super-Beacons. See it below:
2) Solving problems with the wrong tools
Since the customer’s robots had a head, the head created a shadow from the stationary beacons to the mobile beacons placed on the robot’s shoulders, i.e. the main requirement – a direct line of sight – was violated. The tracking was poor, and the direction was even worse.
The customer’s logic was clear: putting more stationary beacons so that the line of sight ruined in one submap would still work in another. Yes, it is possible to create overlapping submaps so that if the head obstructs one of the robot’s mobile beacons, another submap would help. But with so many submaps and other solutions for the same problem, it was clearly suboptimal because the complexity of the map skyrocketed with little chance of really succeeding.
A much simpler, far more robust, and recommended whenever possible solution is to put the mobile beacons so that they are not obstructed at all, in this case, by the robot’s body/head:
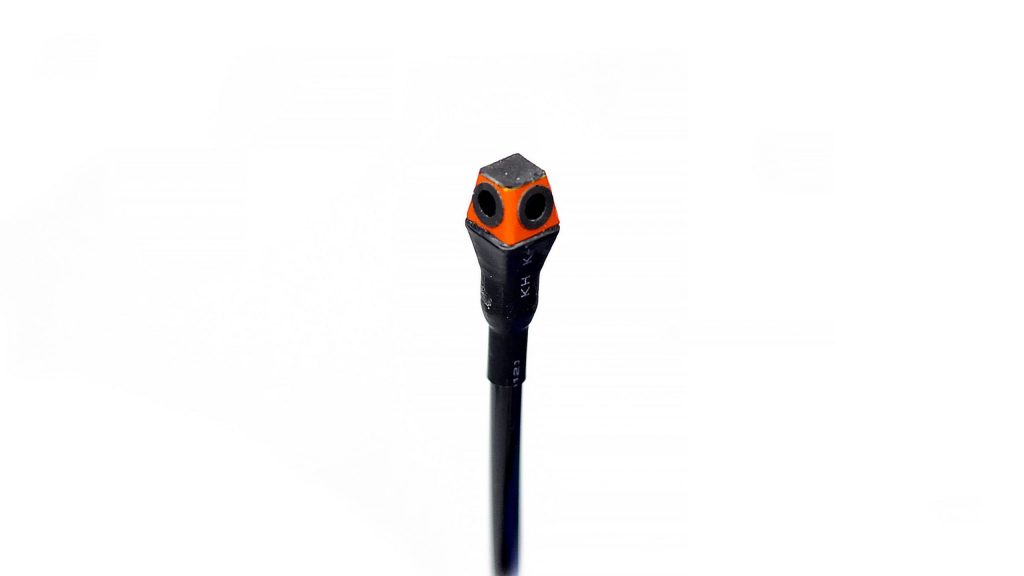
- Using tiny Omni-Microphones around the head and above the head – like small antennas
3) Not creating handover zones
Though, if you follow the advice 1), then you don’t have this problem at all. But if you have to create several submaps, you must have handover zones – overlapping of service zones of neighboring submaps. In this case, there was zero thickness. For the slow-moving robots, they shall be 50-100 cm or so. At least 3-4 location updates must be within the handover zones to make it smooth (soft handover).
4) Jumping over steps
Rushing to the final configuration is probably the most common reason for struggling with the indoor positioning system. We have several videos about that.
The message is very basic: don’t try to jump over steps. Build the simplest configuration possible and only succeeding with perfect tracking in it increase the complexity with one step at a time.
Such a simple step-by-step approach is the fastest and most reliable method to build as complex indoor positioning systems as you wish.
On the autonomous indoor drone example, we also explain the same: Eight essential steps from unpacking to autonomous drive/flight.
Thus, the proper steps for this case would be:
- Build a basic 2D (XY) IA map consisting of a single submap with a single mobile beacon on a tripod
- Optimize the performance by building a small but sufficient service zone. It increases the update rate
- After succeeding with tracking, place another mobile beacon on the tripod on the same base as your robot’s. Track it separately from the first beacon. Send the first beacon to sleep
- Track both mobile beacons (hedges) together but not paired
- Pair the beacons and get Location + Direction
- Only after that install the hedges on the robot and achieve the same tracking
- And only after that introduce another robot
Results
We followed the steps above and quickly achieved the required tracking quality. Most of our time with the customer was spent on arranging proper mobile internet connectivity to enable the remote deployment of the system.
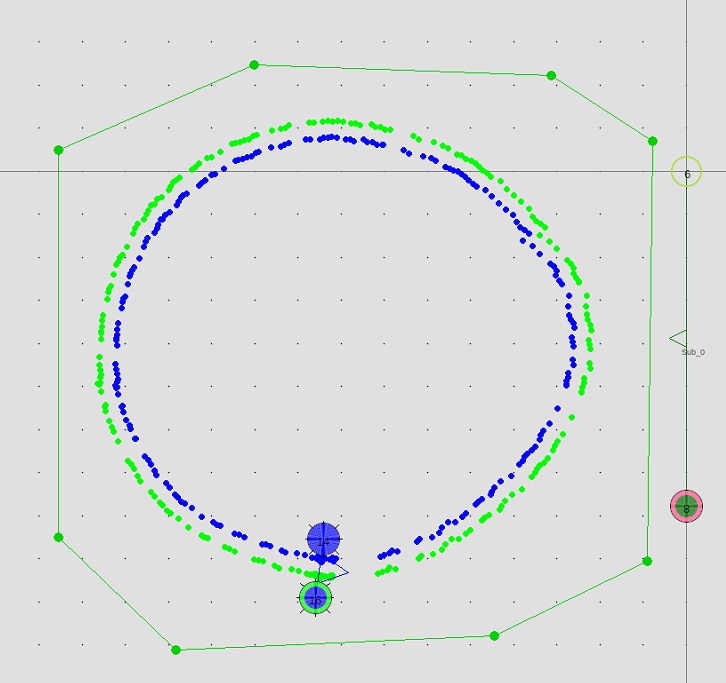
Tracking two mobile beacons at once
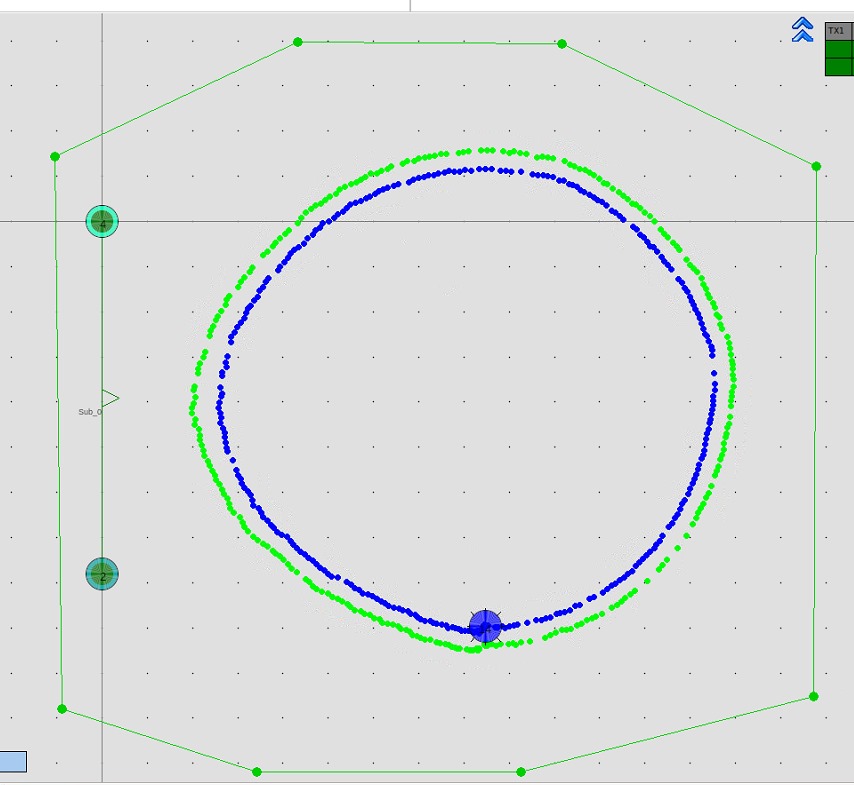
Tracking two mobile beacons in the paired mode with Location + Direction
Only after successfully tracking two independent mobile beacons is it time to pair them and get Location + Direction. Notice the “nose” – precisely showing the direction that the robot faces.
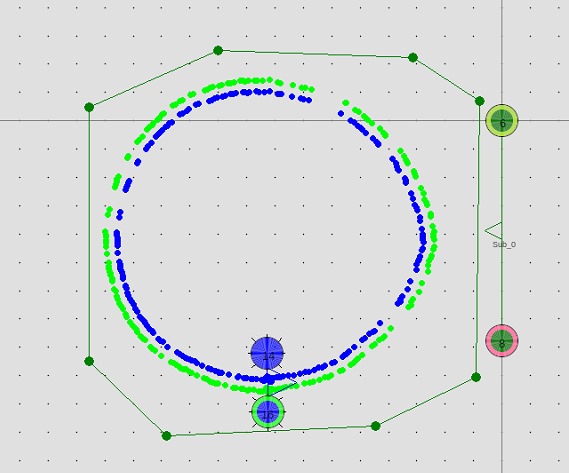
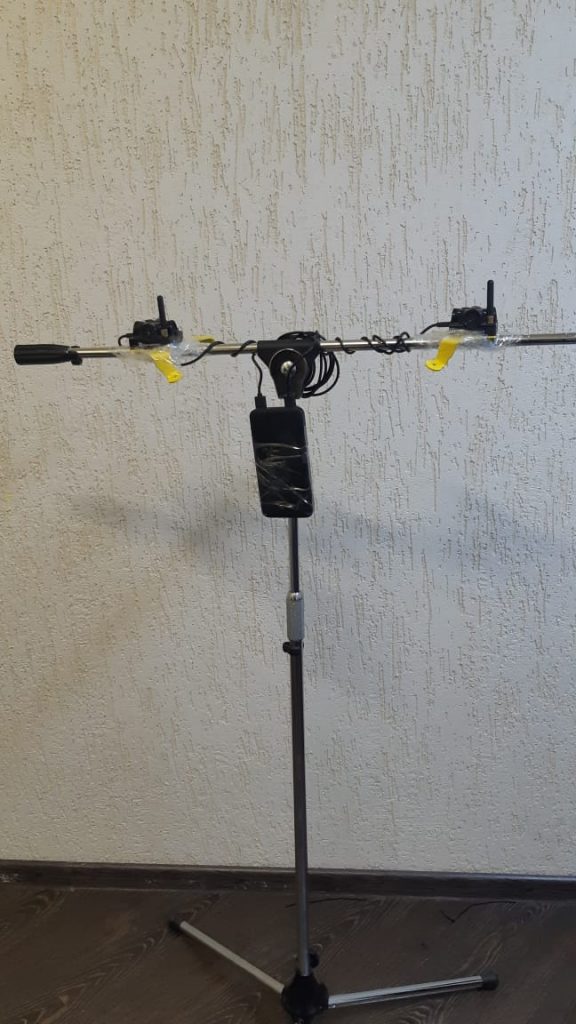
Using tripod before moving to robots
Before driving the autonomous robot, achieve the perfect tracking on the tripod with the height and base between the beacons close to that of the real robot.
Radio interference
As you can see, there are some drops in tracking. Since the lack of time with the case and because it didn’t really affect the robots’ ability to drive, we didn’t spend time identifying the exact reason for that. There is always a chance for some bugs in our system or particular issues with the setup (remote, with unknown Linux on an unknown PC running other apps, etc.) but more likely it was due to a radio interference on site since the RSSI from the beacons to the modem and from the modem to beacons was good: -50 dBm to -80 dBm or so.
Quick solution would be to move everything on another channel or just another one and see whether anything changes. Maybe, the radio interference was static and relatively narrowband in terms of frequency.
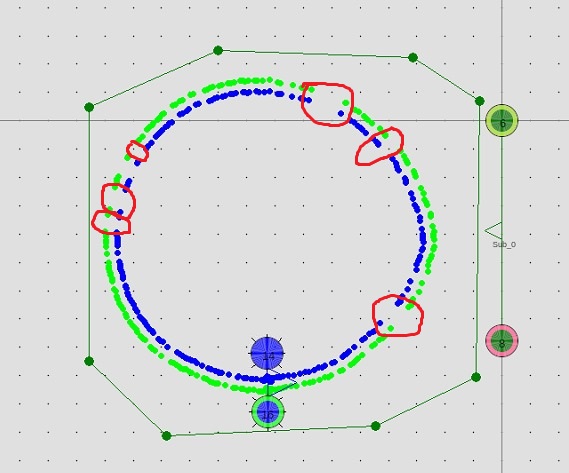
And the issue is not that simple. Very likely:
- For whatever reason beacon n6 loses the radio connectivity
- Since there are only two stationary beacons, it affects the tracking for all mobile beacons in the area
- Thus, for example, a fully overlapping submap could be a good solution. In theory. Because it practice, depending on the true origin of the problem, very likely the beacons from another submap would also be affected by the radio interference. Moreover, the update rate would slightly drop since each mobile beacon would have to listen and filter 4 different frequencies instead of 2. A lower update rate could lead to other issues, for example, with fast forklifts or drones. So, one small issue may pull several other issues
As discussed in the chapter about wrong tools, it is theoretically possible to solve the issue with fully overlapping submaps. However, the recommended way is to debug deeper and solve the root of the problem – likely the external radio interference – rather than cover it up with patches of overlapping submaps and similar solutions.
Final robots view
Unfortunately, we can’t show the final robots’ view because, as typical, the case is under an NDA.
Summary
Deploying a precise indoor positioning system to provide autonomous indoor navigation for multiple show robots is not complex at all if basic guidance is followed. At the same time, not following the recommended step-by-step approach easily leads to a struggle in a relatively straightforward case.
Random post
Categories
Tags
| M | T | W | T | F | S | S |
|---|---|---|---|---|---|---|
| 1 | 2 | 3 | 4 | 5 | ||
| 6 | 7 | 8 | 9 | 10 | 11 | 12 |
| 13 | 14 | 15 | 16 | 17 | 18 | 19 |
| 20 | 21 | 22 | 23 | 24 | 25 | 26 |
| 27 | 28 | 29 | 30 | 31 | ||
